How To Install Brick Veneer To Jazz Up Traditional Walls?

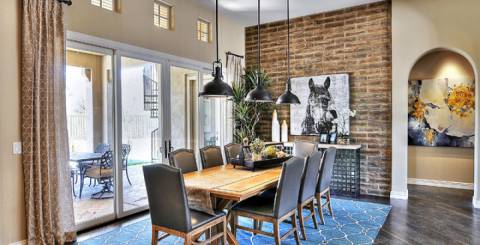
Brick veneer panels have become the most popular choice for home owners. These panels are perfect to give your home a traditional yet classy look. If you are planning to overhaul your home and want to add an aesthetic and durable feature of a brick wall, brick veneer wall is what you should consider.
Advantages of installing a brick veneer wall
Gives Traditional Look:
Brick Veneer Panels are a perfect way to give your home a traditional look. Though having a brick wall is completely a different scenario with real clay bricks being installed on the desired place, brick veneer helps to achieve the same look but on an established wall.
Lightweight
Veneer bricks are extremely similar to clay bricks. Veneer bricks are built with shale and clay. The appearance and texture of these bricks are much similar to clay bricks. The only basic difference between the two is the thickness. Clay bricks are quite thick in comparison to veneer bricks. Clay bricks are normally 3-4 inch thick whereas veneer bricks are only 1-inch thick. This feature also makes veneer bricks very lightweight. They are not only easy to handle but also easy to install.
Better insulation Capability
Better insulation capability is another popular benefit of using brick veneer panels. You can use different brick veneer panels in different rooms of the house. You can easily personalize the degree of insulation. They offer great heat and sound insulation in comparison to other types of materials. You can use them for siding. Also, they are available in different shades, textures, colors and prices.
Better customization options
Since brick veneer panels have better insulation capability, you can easily personalize them according to your needs and specification. Whether you want to install them in your bedroom or a kitchen, they can be easily customized.
Latest trend
As a matter of fact, brick walls are the latest trend in home décor. Nearly every homeowner is either planning to get them installed or have already installed. If you cannot afford to install natural clay bricks to get the brick wall design in your home, brick veneer panels are here to rescue you.
Less expensive as compared to clay bricks
The most important thing that makes veneer bricks so popular is the fact that they are very cost-effective. The installation and construction of these panels are much less than the natural clay bricks. In addition, the actual durability and overall ease-of-maintenance ensure that they do not offer high maintenance costs in the long run.
Steps to install brick veneer wall
Installing a brick veneer wall can be extremely easy provided you have all the right tools and know-how. If you keen to do-it-yourself, here is the step by step instruction on installing a brick veneer wall.
Step 1: Set up the wall
Firstly, you would need to prepare the wall on which you want to install the brick veneer panels. Make sure the wall is clean and smooth. Debris and dust will make it difficult for the panels to stick and bond with the wall. Now you will need to create a ledger with the help of wood. This ledger will help you to keep the panels straight and level. You can remove the ledger once you are done with the installation.
Step 2: Prepare the brick veneer panels as per your requirements
Once you have the wall prepared and ready for the installation, you can start cutting the bricks. You will need to install the corner bricks first, thus you can cut the bricks accordingly. Measure the length and height of the bricks and using a tile saw, you can cut brick panels in half in order to avoid wasting time while installing the wall.
Step 3: Pay close attention to corner brick panels
As mentioned earlier, you will need to install corner bricks first. The reason behind installing them first is because it is easy to configure the rest of the wall once you have smooth and right edges. Before the installation, spread mastic over the wall. Start from the bottom corner and make your way up.
Step 4: Install full rows now
Once you have installed the corner bricks, now is the time to stick full rows. Install the bricks row by row keeping them straight in line. Make sure the rows are leveled using a 4-foot level.
Step 5: Mind the space for grout
Create space between upper and lower rows of bricks of about 3/8” to 1/2“. You can take the help of a scrap wood to leave the gap for grout.
Step 6: Fill the gap with grout
Now is the time to fill in the grout where you left the space. However, before filling in the grout, make sure you leave the wall for a day or two to let it dry. Now squeeze through the spaces to put grout in.
Congratulations! You have built a brick veneer wall. Now decorate it with your family photos or scenic posters.
Similar Articles
Your living room is the heart of your home—a space for relaxation, entertainment, and family gatherings. One of the easiest ways to transform its look and feel is by choosing the right curtains.
Discover top embroidery techniques like Crewel, Chikankari & Satin Stitch to elevate your curtains with elegance. Perfect for luxurious home decor!
Learn why a sofa bed is a must-have for first-time homeowners. Save space, host guests, and adapt to changing needs with this stylish, functional investment.
Getting a good night’s sleep isn’t just about having a comfy bed – the entire bedroom plays a role in promoting rest and relaxation
Looking for a bold way to elevate your home or office? Black wallpaper is a game-changer.
Making the decision to remodel a bathroom can be an exciting endeavor. However, oftentimes, people fail to realize just how challenging it can be.
Want stylish lighting? Find the perfect neon signs for room decor and turn your home into a vibrant, stylish haven with glowing accents. Get inspired today!
Ready to enhance your decor with a neon retro sign? Don't forget to check out how this vibrant decor piece can create the perfect atmosphere in any room.
Plastic chairs are a top choice for cafes, offering durability, easy maintenance, and cost-effectiveness. Enhance style, comfort, and functionality effortlessly!


